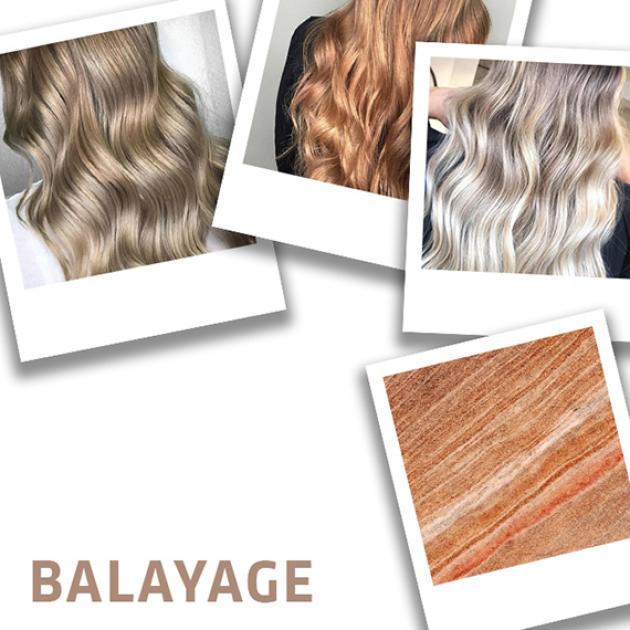
Balayage vs. Ombre Hair: The Differences to Know
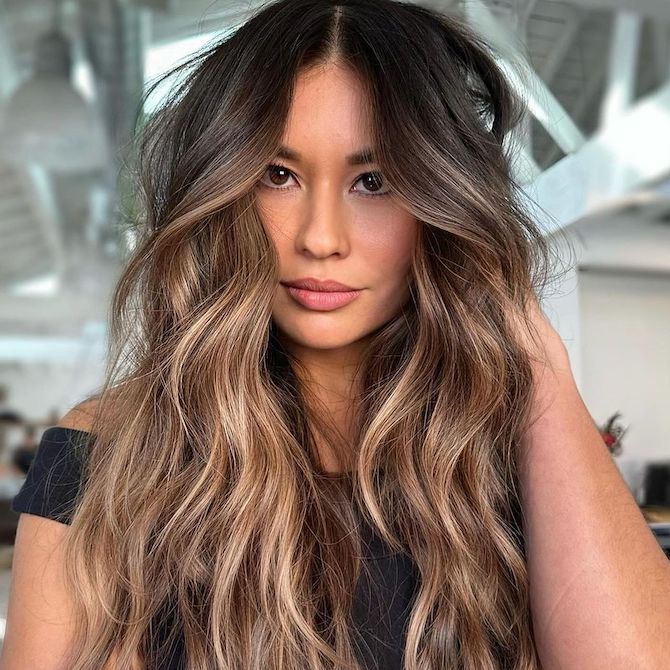
We’ve all seen it happen. A client comes into the salon asking you for balayage, but when they pull out the reference photo, you’re faced with a seamless ombre hair look. The two techniques are easily mixed up thanks to all the features they have in common, but you know just how different they really are. So, how do you explain those differences to your client?
Here, we’re breaking down all the balayage vs. ombre benefits to know, so you can share them with your clients to help them choose their perfect look…
But First, What Makes Balayage and Ombre Hair Similar?
There’s got to be a reason why a traditional balayage and ombre are often mixed up… right? Here are some of the benefits that make these two techniques so similar:
- The mid-lengths and ends of hair are set aglow. With a traditional balayage or ombre (as opposed to ‘reverse’ techniques), all of the drama is focused on the lengths to lend a dimensional effect.
- They both offer soft regrowth – if you work with the natural root colour. Because the lightener is focused through the mid-lengths and ends of hair, you won’t have strong demarcation lines through the root area, allowing for seamless growth.
- Any colours will work. So, whether your client loves naturals, pastels or bolds, they can find an ombre or balayage shade combination that perfectly suits their style.
So, What’s the Difference Between Balayage and Ombre Hair?
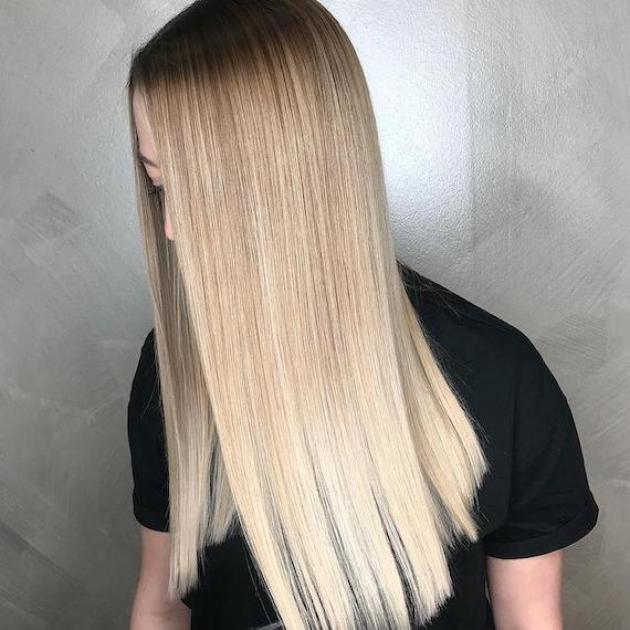
The big difference between balayage vs. ombre hair is in the way colour or lightener is painted through strands. Balayage has evolved over the years, but for a traditional balayage, it’s focused on the surface of the hair and swept through sections with a bespoke freehand technique. You can truly tailor the highlights to enhance your client’s features, whether that means adding a low volume of ribbons for a candlelit effect or a high volume of highlights for beachy dimension. Meanwhile, ombre hair follows more of a pattern. The lightener is applied horizontally through the full width of lengths and ends, creating a distinctive gradient from dark to light (or light to dark in a reverse ombre). So, even though both hair colour techniques traditionally lighten and brighten the lengths, all that sweeping and painting results in two very different looks.
Want to see for yourself? The first photo below shows balayage hair and the second shows ombre hair, so you can see just how different the finishes are…
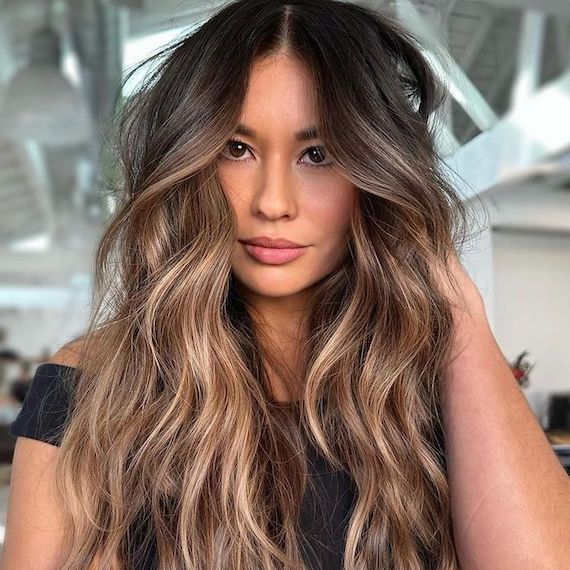
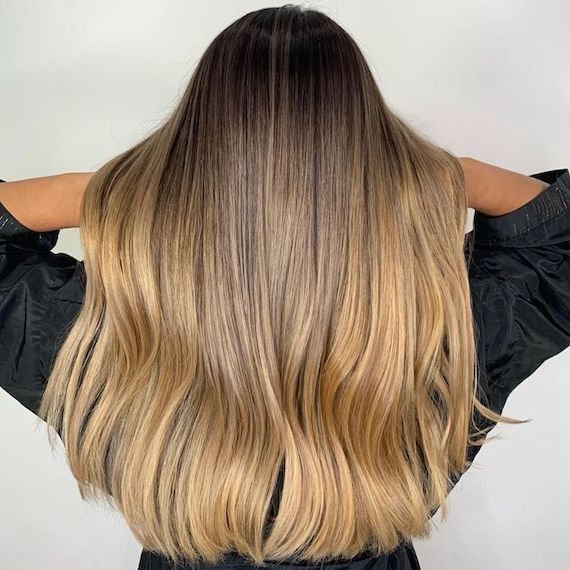
Image Credit: @danielmbeauty | @xcellent_kevin
But the unique benefits of balayage vs. ombre hair don’t stop there. Here are more details that set them apart…
For Balayage:
- The baseline can vary. Some lightened pieces may start closer to the root, while others might adorn just the very ends for a dimensional glow.
- Because the formula is usually focused on the surface of hair, the lower layers can sometimes appear darker to create contrast.
- It’s traditionally developed in the open air for a soft, seamless finish – although you can wrap pieces in foils to enhance the lift. This is called ‘foilyage’.
- You can sweep on a mix of babylights and chunky highlights, depending on the finished look your client is going for.
- All hair types can work the look, from straight to wavy to curly to coily.
For Ombre Hair:
- You’ll be painting and saturating the full width of hair, including the lower layers, to create the most seamless graduation from dark to light (or light to dark).
- You can take the look bold with contrasting colours, or go for a seamless transition with a subtle ombre (AKA ‘sombre’).
- Straight hair works best with this technique, as it’s easier to see the gradient. Clients with waves, curls and coils may prefer a balayage.
How Do You Choose Between Balayage and Ombre Hair?
To figure out which technique is right for your clients, it’s important to understand their hair goals, so you can design a plan and process that works uniquely for them. Some might want a traditional ombre, others may crave the higher lift of foilyage, and there may even be cases where you combine both techniques to achieve their desired look.
Map this out during their consultation, using their reference photos as a guide, and talk your client through the benefits to land a look that works with both their style and their lifestyle.
Choose Balayage If…
… your client wants a truly bespoke finish to their highlights. Balayage can be placed anywhere throughout the hair, so you can play with light and shadow to enhance your client’s favourite features. That might mean adding a face frame to set their complexion aglow, or stretching their root section to create a lived-in blonde. This painterly technique is also the perfect pick for fine-haired clients who crave volume-mimicking dimension. Plus, it works on all hair textures, including wavy, curly and coily haired clients who want to give their lengths a low-maintenance glow-up. Essentially, it’s one of the most versatile highlighting techniques around, allowing you to enhance any hair type, in any colour combo, from sun-kissed to pastel.
The Most Popular Balayage Techniques
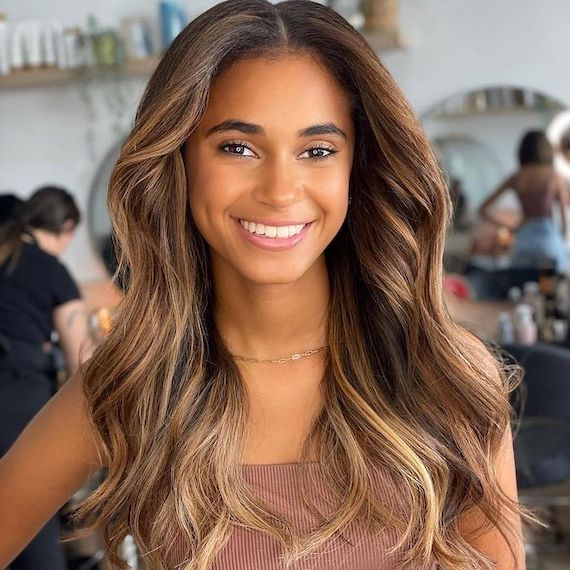
Traditional Balayage
Image Credit: @plismam.oficial
This is balayage in its truest form, where sections of hair have been painted with lightener in a tailored fashion, giving the client a bespoke boost of brightness through their lengths and ends. Locks were lightened first with Blondor Freelights, which is specially formulated for freehand techniques, featuring an adhesive mass that ensures it stays exactly where you place it. Then, highlights were toned with Color Touch 88/07 + 88/03 + 1.9%, lending a caramel blonde finish that feels oh so sun-kissed.
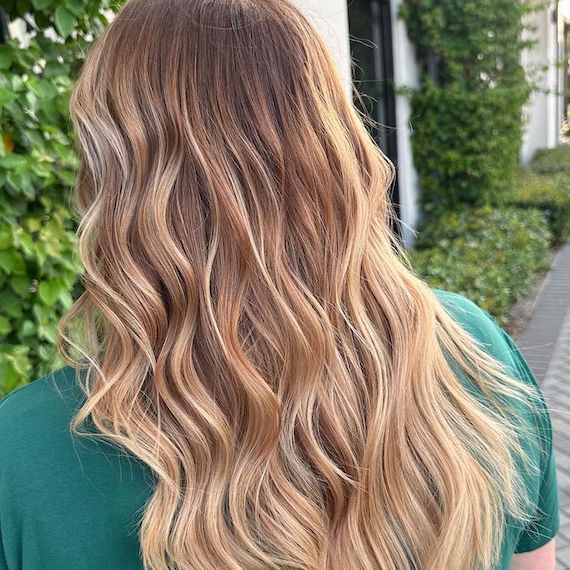
Foilyage
Image Credit: @williamnewberryhair
For clients who want extra lift, or to isolate strands for even more contrast, foilyage is the way to go. It sees those painterly pieces wrapped up in foils, just like traditional highlights. You can either use foils for all lightened sections, or combine with ribbons developed in the open air. The latter lets those foilyage-d pieces really pop with elevated dimension. Try it yourself by sweeping on a combination of ultra-fine and chunky highlights and adding in a few well-placed foils. Then, for the sunny blonde hue seen here, tone with Shinefinity 09/02 + 09/36.
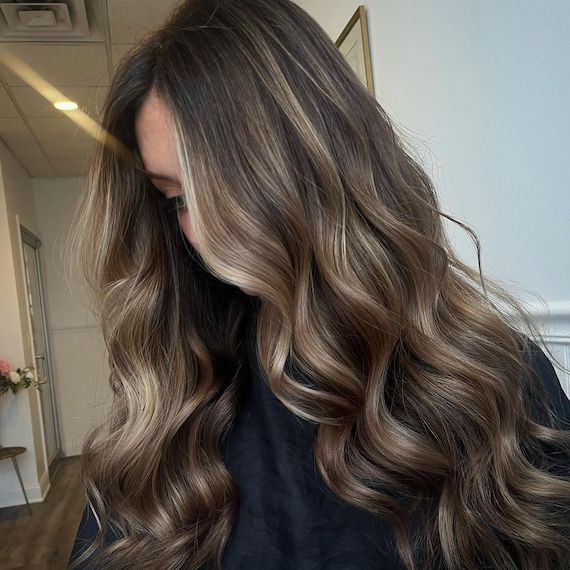
Reverse Balayage
Image Credit: @hairbyangelaalberici
While a traditional balayage sees mid-lengths and ends of hair painted in a lighter hue, the reverse look involves adding a root stretch to already-light locks to achieve the same effect. This is a great option for clients who have a half or full head of root-to-tip highlights, but want to transition to a balayage in order to embrace a darker shade. Case in point: this reverse balayage, which features strokes of chocolate brown painted through the root section of bright blonde locks, alongside a scattering of lowlights on the lengths. Great for a seasonal update, it lets your clients go from lighter to darker in the subtlest way.
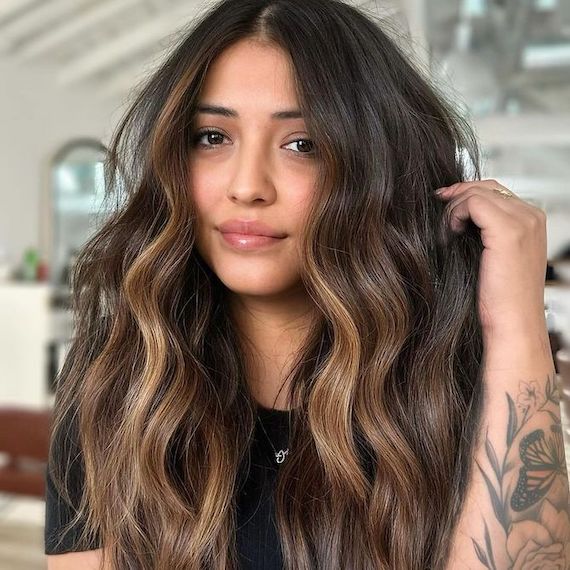
Partial Balayage
Image Credit: @danielmbeauty
Partial balayage takes the freehand technique to even lower-maintenance levels, putting the spotlight on one chosen section of hair that your client wants to elevate. Here, it’s all about the face frame. While the rest of the hair features only a small number of lightened ribbons, the front has gone big on brightness with weighty strokes of Blondor Freelights. Then, locks have been toned with Color Touch 7/73 + 6/7, giving brunette hair a touch of golden blonde that’s statement-making and subtle at once.
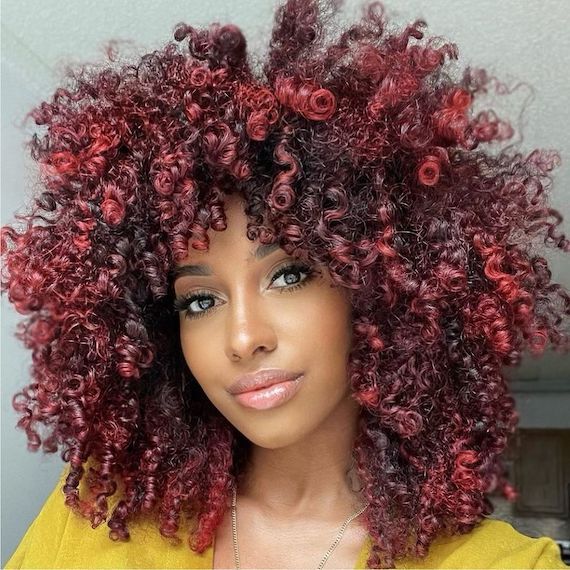
Chunky Balayage
Image Credit: @mayssas_beauty_mark
You already know that chunky highlights are back in a big way – but did you know they’re perfect for bumping up a curly balayage? By adding thicker ribbons to ringlets, you help their shape stand out. So, grab the tint brush and saturate wide slices of hair with Blondor Freelights to create major curl definition. Then, if you want to create a scarlet red mane like this, tone with Color Touch 66/45 + 77/45.
Choose Ombre Hair If…
… your client prefers a softer, more seamless transition in depth – no matter their colour. The graduated effect means there’s less focus on contrast, and more on melting tones together. Dark-haired clients who want to dip a toe into lighter hues will love this effect, as they can start ultra subtle then dial up the brightness as and when they feel ready. That said, ombre can also be taken even bolder than a balayage. All you have to do is increase the contrast between dark and light tones, and the full saturation of lengths and ends will do the rest.
The Most Popular Ombre Techniques
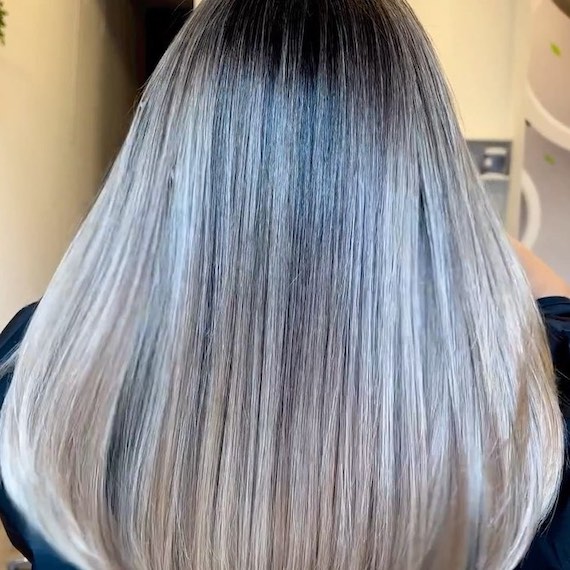
Traditional Ombre Hair
Image Credit: @florealdea_hairstyle
This is your classic ombre creation, featuring dark brown on the roots, and cascading into shimmering caramel shades through the lengths and ends. To recreate the look, you want the ends of the hair to be at least three levels brighter than the root section – if not more – so you may need to add a root shadow for extra depth. Here, that’s been carried out with Shinefinity 04/12, before BlondorPlex + 6% has been painted through the lengths to lighten. Then, Koleston Perfect 10/96 + 9/81 + 9/97 + 1.9% has sealed the deal as the golden toner, delivering megawatt shine we can’t get enough of.
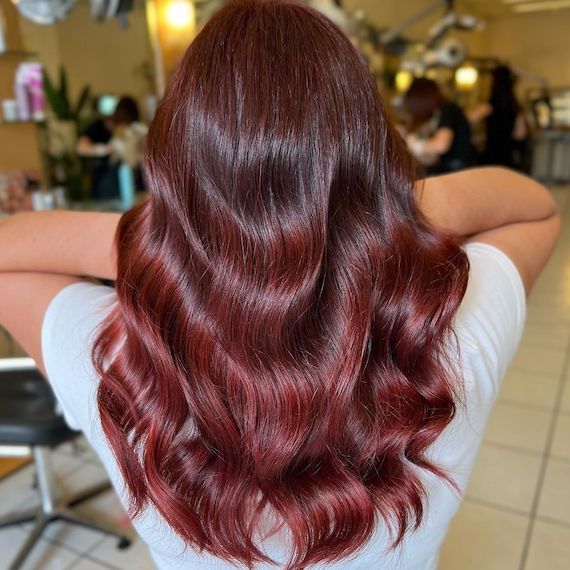
Sombre (Subtle Ombre) Hair
Image Credit: @meganehairstylist
Sombre hair is a sheer, shine-enhancing take on ombre hair, where the lengths and ends will only be two or three levels lighter than the roots. This burgundy masterpiece is a great example of how seamless the look can be, and your slightly more lightener-shy clients will love the opportunity to ‘test’ lifted lengths without changing their look too much. Then, if they get hooked on the melt, they can upgrade to a traditional ombre, with extra brightness glistening on the ends.
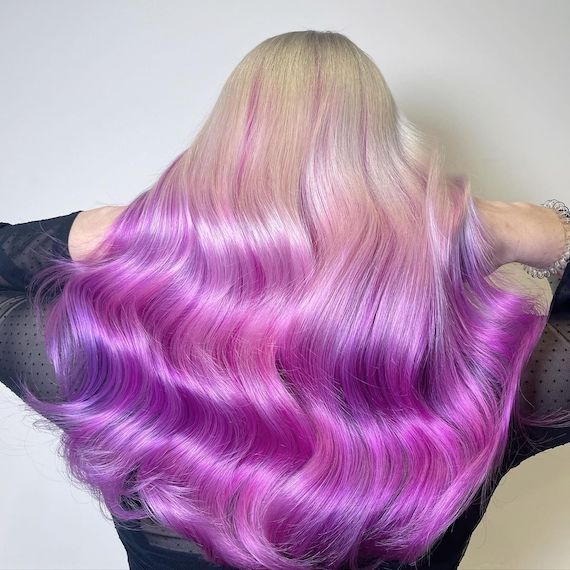
Reverse Ombre Hair
Image Credit: @nikkiclifford_hair
Usually, ombre hair segues from dark on the roots to light on the ends, but a reverse ombre turns that look on its head – literally. The statement switch-up is a popular choice for bolder colour combinations, where your client might be working blonde on the roots to allow rainbow or pastel lengths to stand out. If this pinky purple ombre is their vibe, lighten hair from root to tip with BlondorPlex + 6%, before toning the roots to mid-lengths with Illumina Color 8/69 + 1.9%. Then, when that formula has been rinsed and neutralized, paint semi-permanent Color Fresh CREATE in Pure Violet + Tomorrow Clear + High Magenta from mid-lengths to ends, so you end up with this ultra vibrant magenta mane.
Now go ahead and share this balayage vs. ombre guide with your clients. Then, when you’ve created their chosen looks, make sure you share them with us on Instagram by tagging @WellHairUKI. We can’t wait to see your masterpieces!

