5 Copper Balayage Formulas For Clients Craving Red
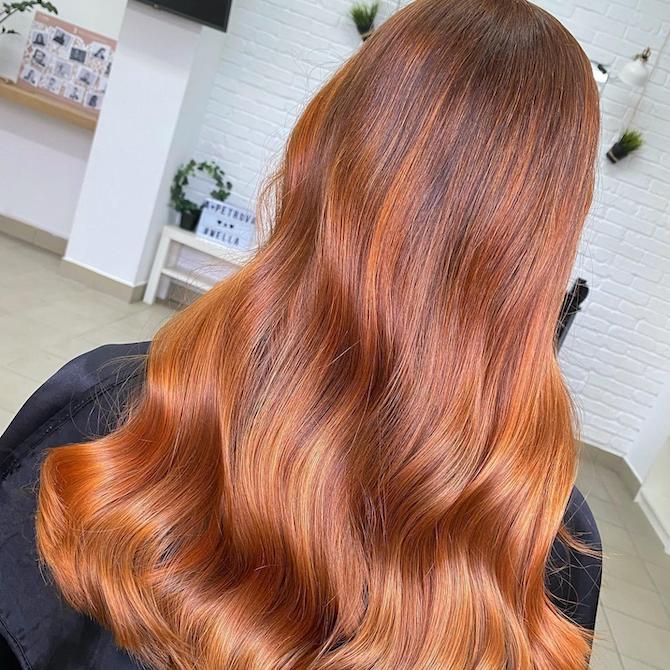
Combine copper hair colour with a balayage technique, and you’ve got one of the most eye-catching trends around; packed with dimension, brimming with shine and resplendent in radiant reds.
You’ve seen plenty of sun-kissed blonde balayage looks, but how do you take it into the red zone? Here, we reveal everything you need to know about creating a copper balayage for your clients…
What is a Copper Balayage?
First, here’s a balayage refresher: the technique sees strokes of hair lightener or colour swept through mid-lengths and ends, resulting in painterly highlights that make hair shimmer. Typically, balayage is developed without foils. However, if you want to enhance the lift, you can wrap the freehand ribbons up to nail a technique known as ‘foilyage’. By applying soft, red tones, you get a copper balayage that glistens through a darker red base. Combine it with a burgundy or mahogany root shadow for cool contrast and a dimension boost.
How to Create a Copper Balayage
1. Mix Up a Pre-Lightener
To make those copper tones pop, you’ll need to apply a pre-lightener in sweeping balayage strokes. Blondor Freelights is specially formulated for the technique, thanks to an adhesive mass that makes it stay in place. This means no smudging, no bleeding and no transferring; just perfectly precise lifting.
2. Sweep the Balayage On
Focus the lightener through the mid-lengths and ends, starting a few inches down from the root. If your client wants the spotlight on one section, try applying a partial balayage that only lifts the top or face-framing layers. This is a great way of creating flattering focal points that shimmer under the light. Once the hair has reached the desired underlying tone, wash and neutralize using Blondor Seal & Care.
3. Tone With the Coolest Coppers
Choose a copper colour based on your client’s desired outcome. If they want a semi-permanent shade, mix up Color Fresh in 6/45 or 7/47. For a demi-permanent glow that’s high on shine, opt for Color Touch in 7/4 or 7/43. Or, for an intense, permanent colour, apply Koleston Perfect in 7/34 or 8/34. You could also try a zero-damage Shinefinity glaze using the shades 05/43 or 06/43. Apply the chosen formula to pre-lightened sections and, for extra dimension, consider adding a darker root shadow up top, too.
4. Shampoo and Style Their Hair
Once the colour has developed, it’s time to wash and neutralize your client’s hair. Use INVIGO Color Brilliance Color Protecting Shampoo, followed by INVIGO Post Color Treatment. Note: if you glazed their locks, you can skip the Post Color Treatment step; Shinefinity is pH-balanced, which means neutralizing isn’t necessary.
5 Copper Balayage Formulas to Try
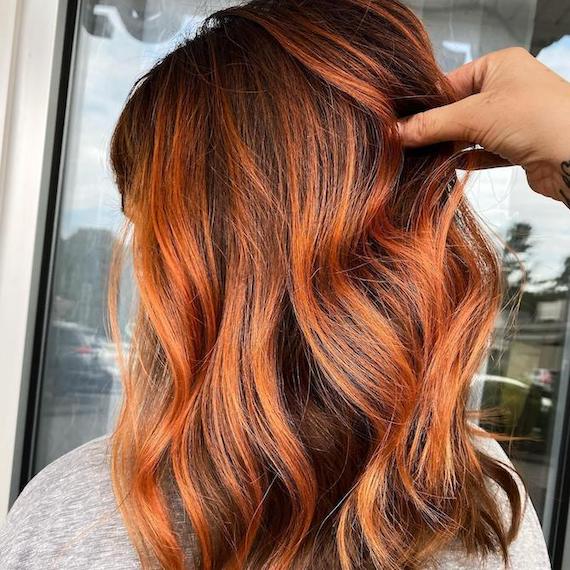
1. Copper Balayage On Brown Hair
Image Credit: @summerevansstudio
Give brown hair a radiant upgrade with flashes of copper balayage, a la this spiced creation by Summer Evans. She used Blondor Freelights + 6% to add pops of brightness to her client’s hair, then toned with Color Touch, using 44/65 + 5/5 on the root, and 7/43 + 7/0 through the mid-lengths and ends.
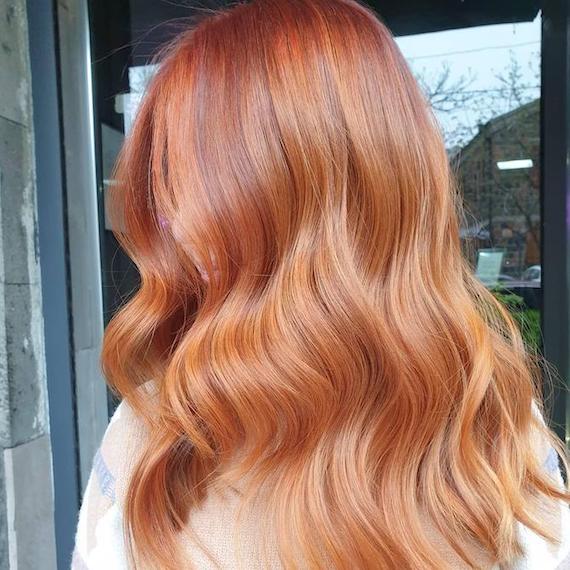
2. Copper Strawberry Blonde Balayage
Image Credit: @hair__lust
Copper and strawberry blonde sit in the same ‘soft yet sparkling red’ family, so it only makes sense that a hybrid of the two results in a subtle and seamless melt. For this particular sun-kissed mane, Blondor Freelights + 9% was stroked through mid-lengths and ends. Then, a copper root was painted on with Koleston Perfect 6/43, followed by a strawberry blonde blend of 8/43 + 0/43 for the ends.
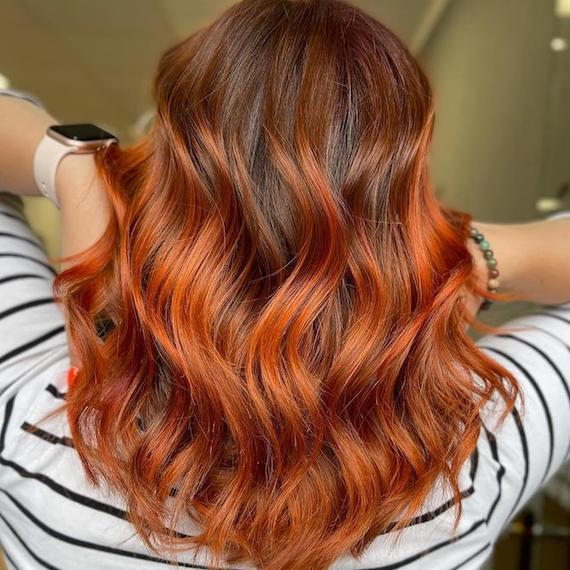
3. Auburn Copper Balayage On Brown Hair
Image Credit: @loickdambrine_hair
Auburn roots meet copper ends in this enchanting balayage, which gets its intensity from two bespoke blends of permanent Koleston Perfect. First up, the roots have been darkened with 6/43 – a golden red-brown hue – then ends have been set aglow using vibrant 99/44. Look at that contrast.
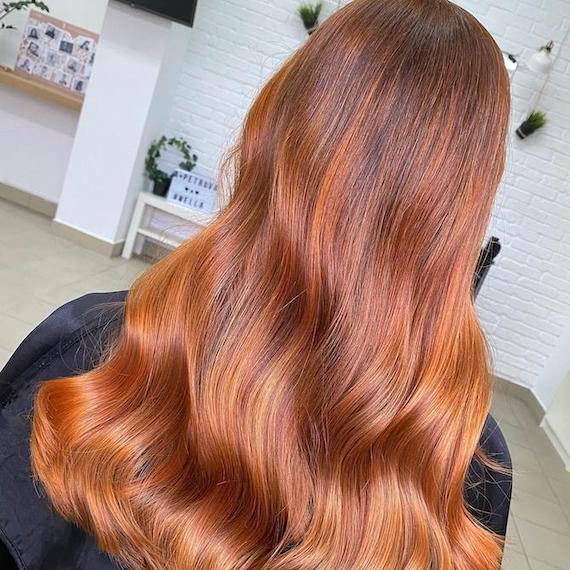
4. Ginger Balayage On Brown Hair
Image Credit: @nesteapetrova
With a coppery brown on the roots and a striking ginger through the ends, this melted mane is the definition of a head-turner. Consider us obsessed. To craft the look for your clients, start by sweeping Blondor Freelights + 6% in delicate ribbons. Then, once hair has been neutralized, brush Illumina Color 7/43 + 6% on the roots, followed by 7/43 + 9/43 + 4% through the mid-lengths and ends.
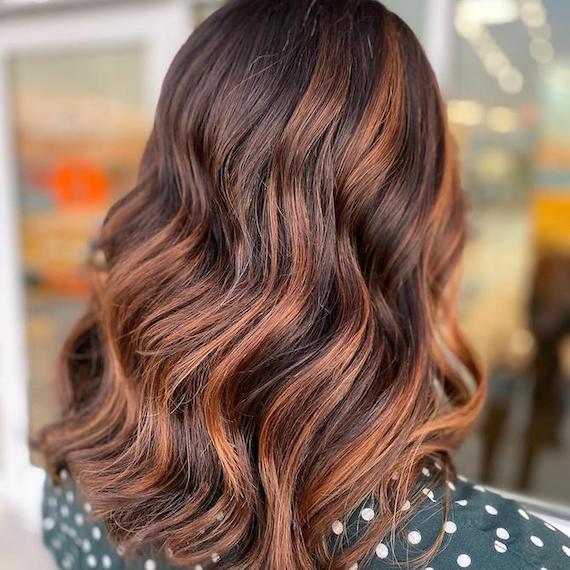
5. Copper Balayage On Dark Brown Hair
Image Credit: @timothy_michael_hair
Copper balayage doesn’t have to be bright and bold. When applying it to dark brown hair, you could try a smaller volume of soft yet chunky highlights, so the look still sits in the brunette category. Tim Lorincz Michael has done just that with this show-stopping creation, which sees sweeps of Blondor Freelights + 9% topped with Color Touch 8/43 + 1.9%.
How to Maintain a Copper Balayage
Red tones are notoriously tricky to maintain, as they can lose vibrancy fast. However, with the right colour care kit, your client can enjoy their copper balayage for longer. Here’s what they need at home…
1. A Shade-Locking Shampoo and Conditioner
If they don’t have a colour-kind shampoo yet, they need to get one in their kit fast. INVIGO Color Brilliance Color Protecting Shampoo is our go-to for maintaining red tones and enhancing shine. It comes in two formulas: one for fine hair and one for thick or normal hair. Recommend they add the smoothing INVIGO Color Brilliance Vibrant Color Conditioner to their routine, too.
2. A Colour-Depositing Hair Mask
Sometimes, red tones need a little top-up in between colour appointments. That’s where the Color Fresh Mask in Copper Glow comes in useful. Designed to be used after shampooing, in place of clients’ usual conditioner, the mask should be applied from root to tip and left to develop for 10 minutes. Once rinsed, it gives balayage a boost of high-shine copper hues, so their shade stays fresh until it’s time to head back to the salon.
3. A Heat Protection Spray
One of the biggest threats to your client’s copper hair is excess heat styling. Exposure to tongs and straightening irons can lead to fading colour and even brassiness. However, not everyone is ready to hang up the curling iron (nor should they have to), which is why EIMI Thermal Image is a home styling staple. Tell your clients to apply it just before any heat styling. A light misting from root to tip will safeguard strands, while enhancing radiance.


