Luxelights is Here to Transform Your Gray Coverage Technique

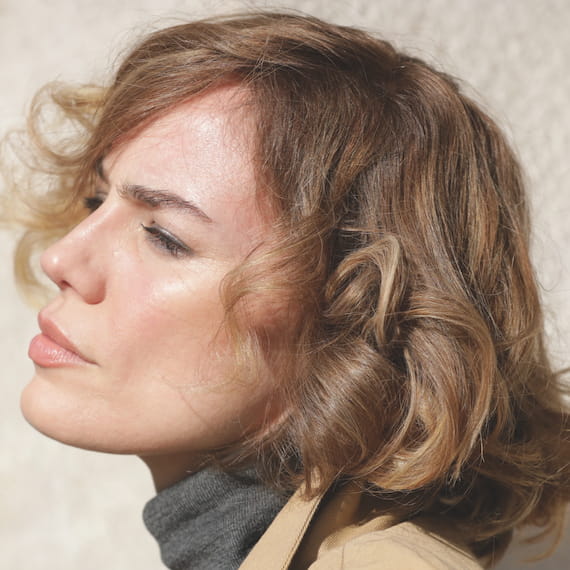
Let’s talk about Luxelights. The latest color service on the Wella Professionals menu; it’s a dream come true for clients who crave gray coverage and a sun-kissed look. You often hear about these results solo, but Luxelights brings the two together, offering glowy color that keeps any silver strays at bay. Here’s the lowdown…

More on Luxelights
Put simply, Luxelights is an upgrade on the traditional gray coverage service – one that focuses as much on multi-dimensional lengths and ends as it does on the coverage of silver strays. The idea is that you don’t just look at camouflaging gray regrowth; you also pick out shades that will make the mid-lengths and ends positively glow.
Designed for clients who want gray coverage that appears completely natural; sun-kissed highlights meet a targeted root touch-up in brand-new Luxelights. No wonder colorists are obsessed. It requires just three steps – highlights, root touch-up and a final gloss – to veil locks in soft shadows and lustrous, multi-dimensional radiance. Learn how to master the technique in our Luxelights seminar here.
Who Suits Luxelights?
Everyone suits Luxelights, just as everyone suits a little extra glow in their hair. However, not everyone wants to cover their grays – and that’s okay. What clients do with their silver strays is a personal choice, but for those who want them to be deftly disguised, there’s no more effective or more natural-looking service. Ditching the sometimes-blocky look of complete root coverage, Luxelights strikes the perfect balance between meticulous and effortless.
Those without gray roots will love this service, too. It’s just another way for them to achieve a soft balayage effect with a subtle root shadow; perfect for clients who want to make the transition from traditional highlights.
What’s the Technique?
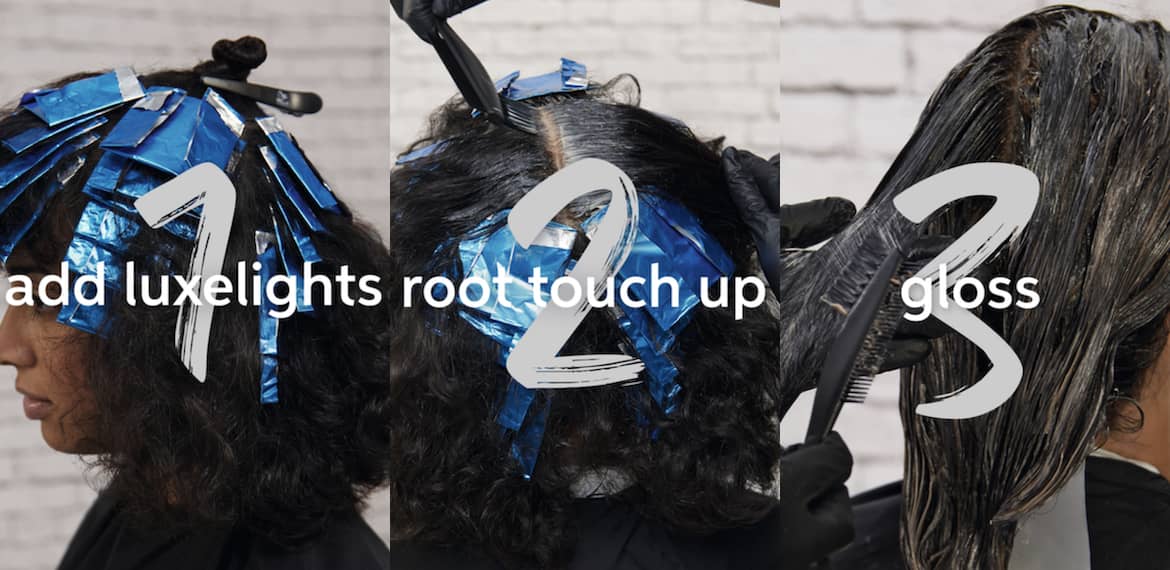
1. Apply the Luxelights
Kick off this gray coverage upgrade with some Luxelights highlights, using our BlondorPlex lightener, which is infused with smart bond builder technology. Lending a lift that strengthens locks, it should be applied a few centimeters away from the root in large weaves. Sweep down to the tips and develop in foils.
2. Shade the Root
Add a soft root shadow with Koleston Perfect; our pure-pigment, permanent color that provides complete gray coverage. Using a tint brush, apply it directly over any silver strands, taking it just over the regrowth line for a seamless blend. Allow to develop, then rinse, use Wellaplex No2, lather up with shampoo and, finally, neutralize locks with Blondor Seal & Care.
3. Get the Gloss
As a final step, bump up the shine and rich tonality in your client’s hair with a glossing service. All you need is a shade or two of Koleston Perfect, the Welloxon Perfect hair developer and the Color Post Treatment. Blend them together, smooth through hair, then evenly distribute with a wide-toothed comb for a perfectly even finish. Leave the formula on for 5-10 minutes, before rinsing until the water runs clear.
Gray Coverage Guidelines to Follow
When carrying out your first Luxelights service, keep these gray coverage guidelines in mind…
1. Mix Enough Natural In
When mixing the Koleston Perfect root shadow 1:1 with Welloxon Perfect, make sure you’ve added enough of the desired Pure Naturals shade. You’ll need 1/3 to cover 30-50% gray and 1/2 for 50-100% gray.
2. Start with the Most Visible Grays
Sometimes gray hair is evenly distributed, and other times it’s concentrated in pockets. If your client has patches where the gray is more intense, apply the root shadow here first. Doing so will mean these areas have color on them for the longest.
3. Saturate the Roots
Don’t be afraid to thoroughly cover the root area with Koleston Perfect. You want to saturate the strands, making sure you don’t spread the color off the hair.
How Much Maintenance is Required?
It’s one of the most frequently asked questions about gray root coverage: how long before clients will want to come back and get their roots refreshed? The answer comes down to the individual but, typically, it takes between 4-8 weeks for regrowth to be noticeably visible.
For those clients who do want the look touched-up, they may only need the root shadow and the gloss re-done. The Luxelights highlights will start to take on more of a ‘balayage’ effect. However, if they prefer their ‘lights to start slightly higher, you’ll need to lift the line with a little BlondorPlex. We’d describe it as a ‘medium maintenance’ look.
3 Luxelights Looks to Try
Created by global influencers Matthias Herzberg (@matherzberg) and Renya Xydis (@renyaxydis), discover three Luxelights looks your clients will love…
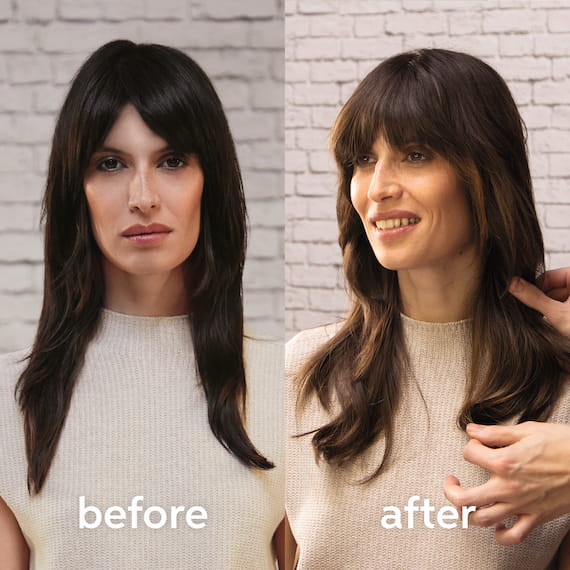
Cool Brunette
For luxurious shine, Matthias crafted a soft, smokey brunette with a luminous beige lift through the mid-lengths and ends. The Luxelights were applied to large weaves in four foils per quarter, resulting in rich, radiant ribbons with an expensive-looking finish. Bye bye blocky color.
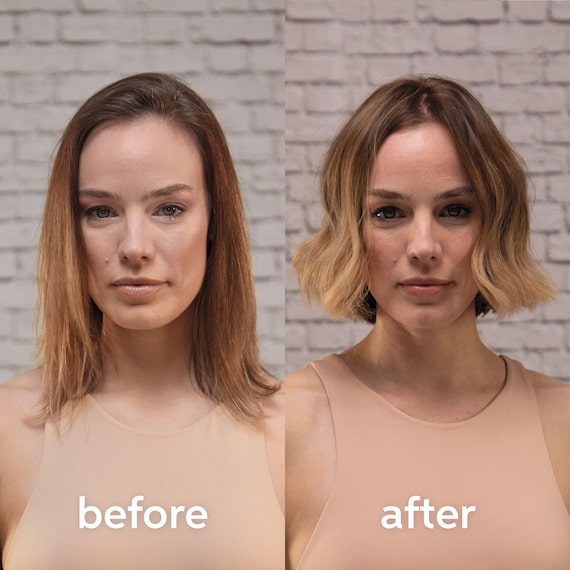
Honey Blonde
Honey blonde hair has never looked sweeter. Here, Mathias has combined rich roots with golden ends; a look Renya has enhanced by trimming in a chin-skimming bob with a loosely tousled wave. The bob hairstyle was split into four sections, Luxelights were swept in fine slices, a shadow of coolness was applied to the root area, and the gloss was smoothed from root to tip. Flawless.
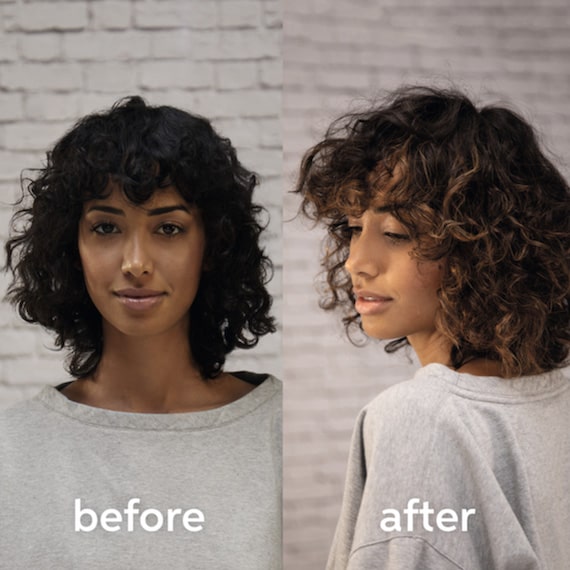
Warm Brunette
Hello, glossy curls. Adding a touch of caramel to this deep brunette look, Matthias worked in large, horizontal weaves when applying the luminous Luxelights. They were left to develop until they’d reached an orange/yellow tone, ready for a golden, glowy gloss. We’re obsessed with the final result.
This Season’s Luxelights Color Palette
Want to see more Luxelights? Watch Global Design Manager for Color & Trends, Christopher Rea, as he talks us through this season’s rich, radiant color palette and the background to the color movement…
