This is How You Do the Perfect Hair Colour Correction
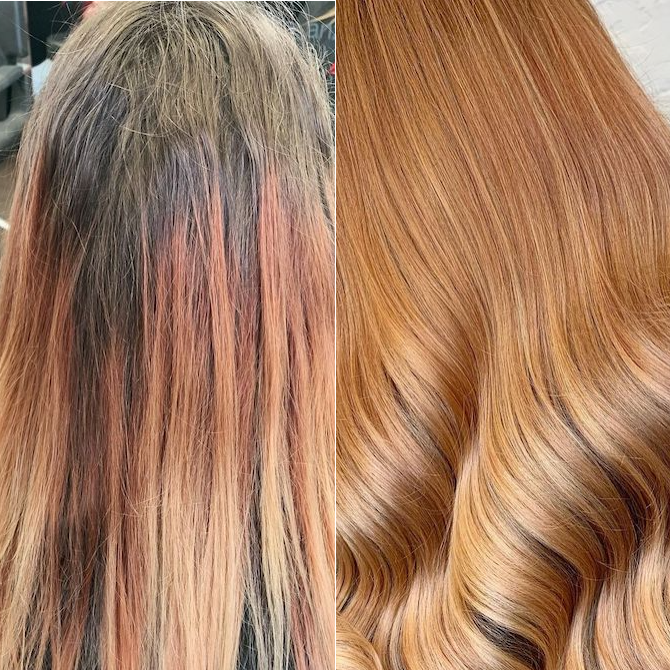
A colour correction is one of the most rewarding hair services you can offer. Sometimes it’s stressful, sometimes it can seem impossible, but it’s always worth it for that ‘after’ shot. So, how do you make sure that corrective coluor comes out looking smooth and seamless? We’ve rounded up the tips you need to know, plus five ‘before and after’ transformations for inspiration...
7 Corrective Colour Hair Tips
1. Start with a Consultation
Don’t go into a colour correction blind. Before booking a big transformation, ask your client to come in for a consultation so you can figure out an action plan. You’ll need to know what you’re working with to make sure you have the right products ready, ensure you’ve booked a long enough appointment, and manage your client’s expectations ahead of their colour appointment.
2. Rinse with Color Renew
All hail Color Renew. If you’re dealing with stubborn colour build-up, this clever ‘colour eraser’ will help to rinse out some of the patchy pigment. It’s a zero-damage reducer that dials down unwanted oxidative colour without lightening locks. It can even be used as a detox for home dye disasters.
It’s simple to use. All you have to do is apply the product from root to tip, focusing on the deepest sections, then allow it to develop for anywhere between five and 45 minutes. If you’re applying fresh colour afterwards, make sure you rinse Color Renew out with water only, and dry hair thoroughly. Then you’ll have the perfect canvas for a fresh head of corrective colour.
3. Observe the Lightening Curve
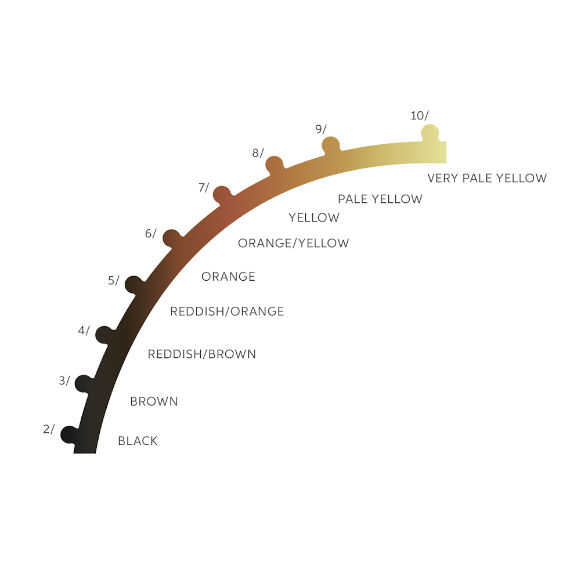
If you need to use a hair lightener to lift out unwanted tones in your client’s locks, make sure you consult the Wella Professionals Lightening Curve first. This clever chart helps you determine what level their colour is currently on, and how many levels you’d need to lift in order to reach their desired colour. For example, if they’re an orange level 6/ blonde but they want hair corrected to a light ash blonde hue, you may want to lift them to a pale yellow level 9/ before applying a cool, crisp toner.
4. Mix and Match Lighteners
Particularly patchy colour may require a more prescriptive approach to lightening. Instead of using one Blondor blend from root to tip, there are cases where you will need to mix up a couple of lightening formulas to treat different sections of hair. For example, dark roots may require BlondorPlex with Welloxon Perfect 6%, while mid-lengths could be in need of a lower developer for a gentler lift. Assess how the tones shift throughout the hair to plan your products and development times accordingly.
5. Balance Brassiness with Olive Tones
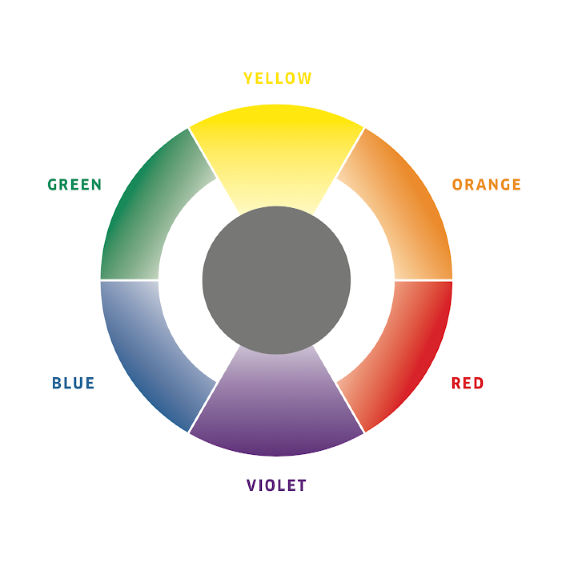
Did you know? When mixing up a corrective colour to balance brassy hair, you can add a little olive to the formula to neutralize overly warm tones. Just look at the Colour Circle. Colours that sit opposite one another on this wheel are able to cancel each other out, while hues that sit side by side result in an all-new shade. Because green is opposite red, it makes sense to add some cendre to brass-busting blends. Try Opal-Essence by Illumina Color in Chrome Olive, mixed in with other Illumina Color shades.
6. Add WellaPlex to Your Formula
Your client’s hair doesn’t need any more stress; what it needs is TLC. That’s why we recommend adding the WellaPlex No1 Bond Maker into your corrective formulas. You’ll already find it built into the BlondorPlex hair lightening, but it can also be added to toners to reinforce each strand’s internal bonds. Complete the process by rinsing with the WellaPlex No2 Bond Stabilizer once the colour has developed.
7. Recommend Post-Colour Care
Once clients finally have the colour they craved all along, recommend a care routine that allows them to lock it down for longer. A safeguarding wash is a must, so suggest they add INVIGO Color Brilliance Color Protecting Shampoo to their bathroom shelf. It helps to maintain luster, shine and colour intensity from one wash to the next. Then, teach them all about the Color Fresh Mask; a weekly colour-depositing conditioner and at-home hair glossing treatment that offers a hint of a tint to keep their shade looking salon-fresh between appointments.
5 Colour Correcting ‘Before & After’ Shots
1. Correcting Red Colour Build-Up
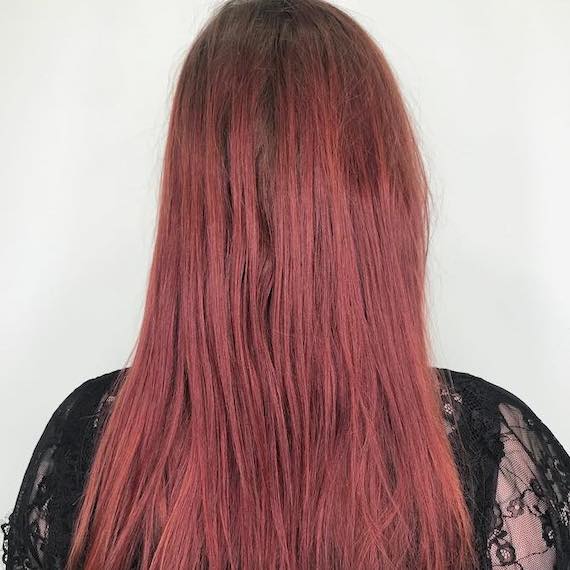
Image Credit: @laila.wella
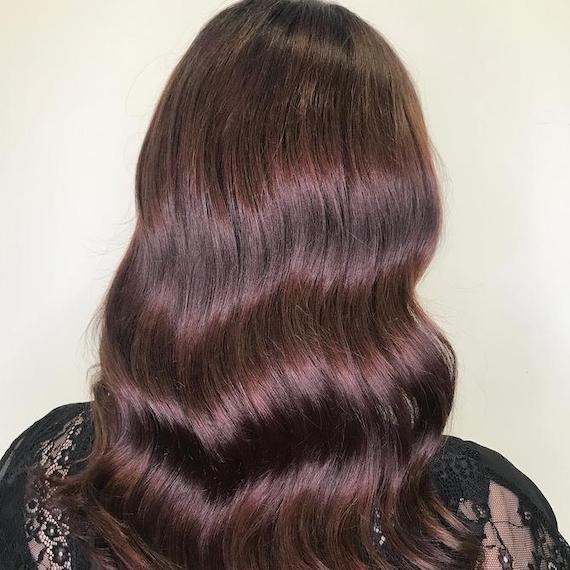
When Laila Pettersen’s red-haired client came in asking for a lower-maintenance colour, she set about creating this beautifully dark brunette hue. Step one saw Color Renew applied to the hair for 45 minutes under heat, which enabled the old red tones to rinse away and reveal a more natural shade. Then, because there was still a little too much orange in there, Opal-Essence by Illumina Color in Chrome Olive was smoothed from root to tip to tone it down. The result? This mesmerizing metallic mahogany.
2. Correcting a Brassy Blonde
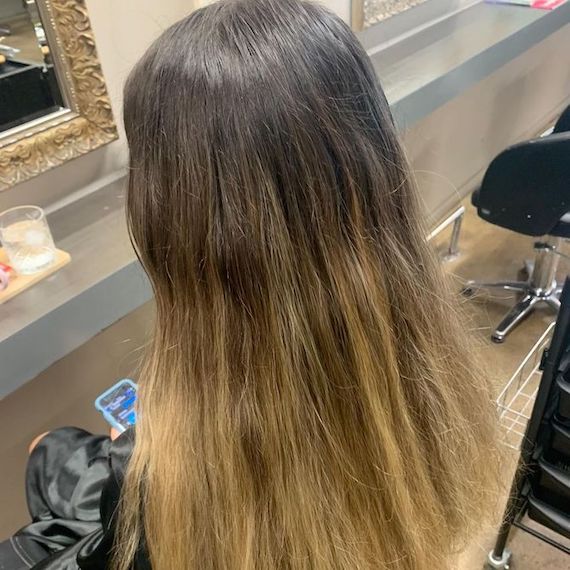
Image Credit: @emily.haircartelle
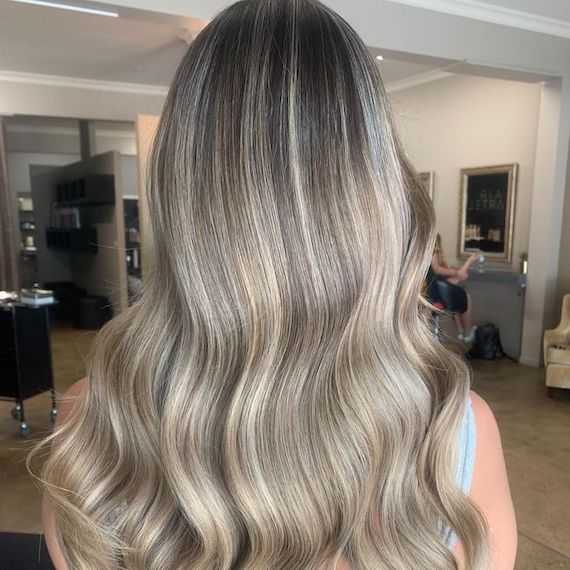
Bringing brassy hair back from the brink is no small task when it’s this blocky. However, Emily Revie breathed new life into these locks with a scattering of foils and a root shadow. First, she applied BlondorPlex + 6% in root-to-tip ribbons to lift the base. Then, she smudged Color Touch 8/0 + 7/97 + 8/81 through the crown area. Finally, to turn those once-orange highlights into cool, ashy strokes, she applied a blend of Color Touch 10/6 + 9/73 + 9/03 to mid-lengths and ends.
3. Correcting Patchy Colour
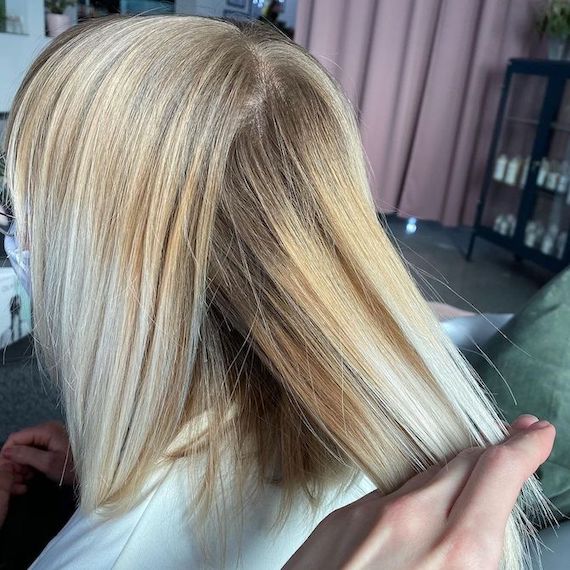
Image Credit: @matherzberg
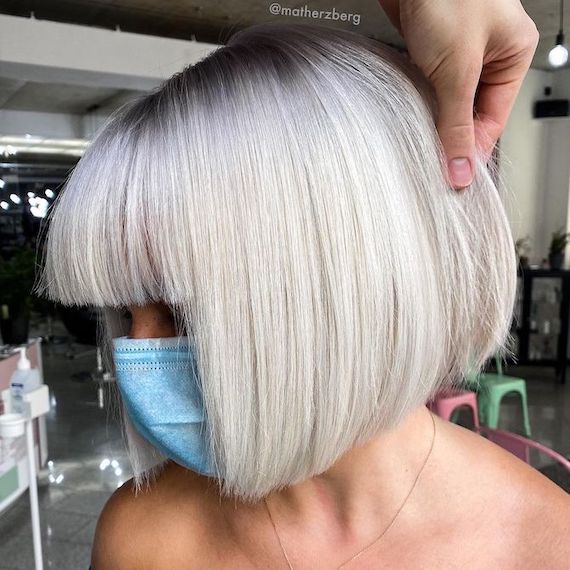
At-home hair faux pas can happen. We saw a lot of them post-lockdown, when clients returned to the salon with DIY dye jobs that hadn’t quite gone to plan. Case in point: Matthias Herzberg’s client used a high-lift hair colour at home to ‘maintain’ her icy blonde, and was left with golden roots against her cool platinum lengths. Disaster, indeed.
So, to correct the clash, Matthias started by lightening mid-lengths first using Blondor Multiblonde Powder + 6%, while leaving the already-blonde ends untouched. After allowing this to develop for a while, he applied Blondor Multiblonde Powder + 4% to the roots. Once both formulas had lifted to the correct level, hair was rinsed and neutralized with Blondor Seal & Care. Then, to finish, Color Touch 10/81 + 8/81 + 3/66 + 1.9% was smoothed over damp locks, resulting in this beautifully balanced blonde. Bye bye, brassy orange roots.
4. Correcting Deep Regrowth
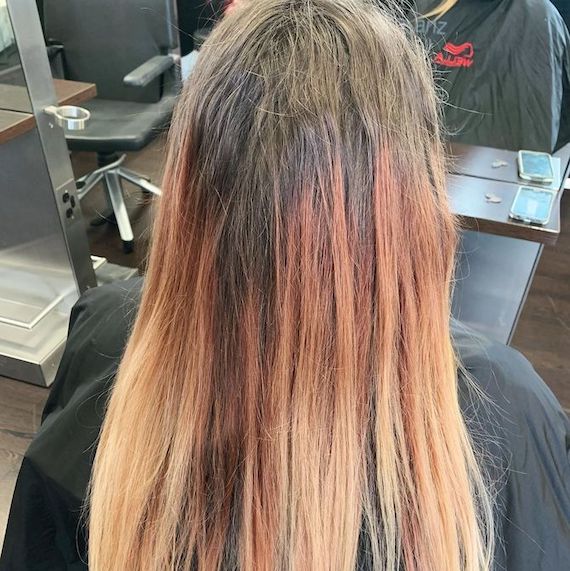
Image Credit: @lyndallvilehair
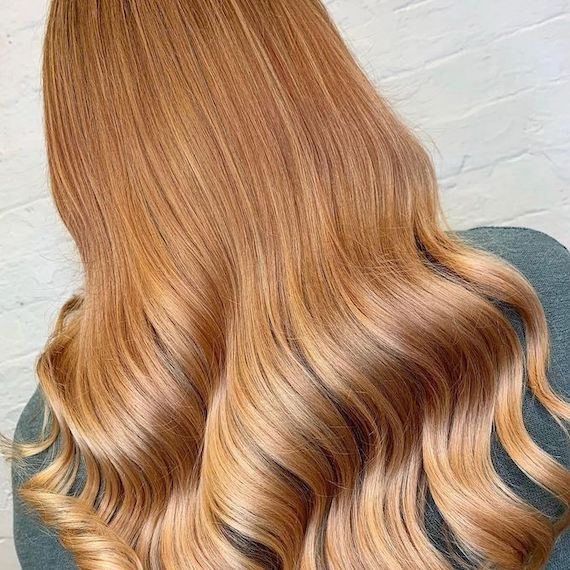
We had plenty of these ‘befores’ post-lockdown, too. Think deep regrowth and faded colour, topped off with an orange sheen that should be strawberry blonde but doesn’t make the cut. This is one of those colour corrections that makes you ask, ‘where do I even begin?’ But Lyndall Vile cracked it with Blondor Freelights through the mid-lengths, leaving the ends out.
The highlights helped to lift out some of the stray coral tones in the hair, while Illumina Color 9/03 + 9/43 applied to the roots helped to revive dark regrowth. Finally, once both formulas had been thoroughly rinsed and neutralized, Color Touch 7/0 + 8/0 was swept through the crown, while 9/03 + a little 9/01 gave the ends a soft glow.
5. Correcting Uneven Regrowth
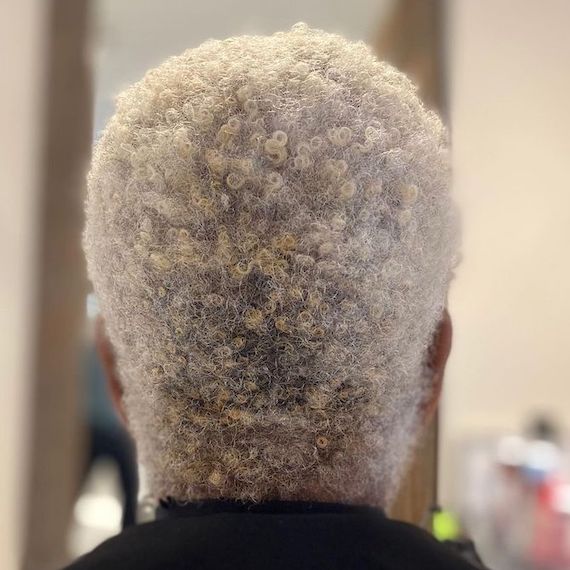
Image Credit: @danadidmyhair
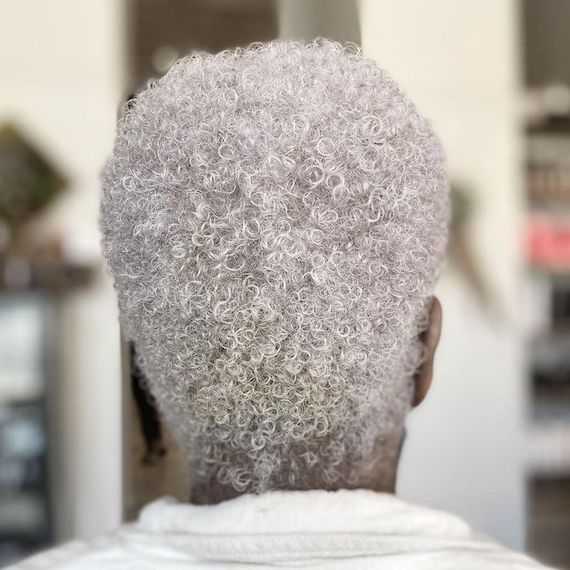
Not all colour corrections have to be a mammoth undertaking. Sometimes, it’s simply a case of blending uneven regrowth, so you don’t get any stray tones throwing cool blondes off course. Just look at these icy blonde curls, for example. Because they’re cropped close to the roots, any grey or dark brunette regrowth is easy to spot. To correct the roots, Danamarie applied Blondor Multi-Blonde Powder + 6% over regrowth, allowed it to develop, then smoothed Color Touch 10/81 + just a touch of 8/81 over the top.

